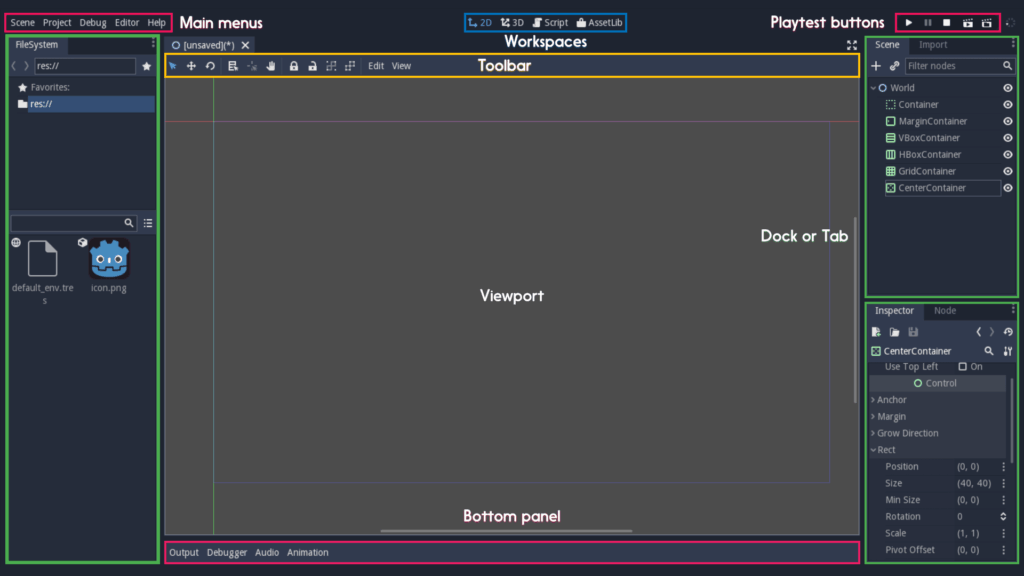
Godot 4 UI is built entirely from Control nodes, and once you understand the three pieces that hold it together, you can build anything from a single health bar to a full responsive menu. Those pieces are Control nodes, anchors, and containers. This guide walks through all three, then builds a real HUD with a health bar and score, and spends real time on the part most tutorials rush: wiring that UI up with signals, so a health bar or counter updates in a controlled, efficient, decentralized manner instead of a tangle of scripts polling each other every frame.
That binding step is where UI projects rot or stay clean. Get it right and you can add a new HUD element in minutes without touching the player. Get it wrong and every change means editing five scripts.
Key Takeaways
- Everything is a Control node: Label, Button, TextureProgressBar, and the rest all inherit from Control, which lives in screen space.
- Anchors for simple, containers for complex: anchors keep an element in place when the window resizes; containers auto-arrange children, and you never set anchors on a container’s children.
- Put the HUD on a CanvasLayer: it draws on top of the game and ignores the camera, so it stays fixed on screen.
- Bind with signals, not polling: the data source emits a signal only when a value changes, and the UI reacts once, instead of reading the value 60 times a second in
_process. - Keep it decentralized: each widget owns a small script that subscribes to its own data, and a global signal bus decouples emitters from the UI across scenes.
The Three Pillars of Godot 4 UI
Godot 4 UI stands on three concepts, and almost every interface problem is one of them in disguise.
- Control is the base class for every UI element. Label, Button, TextureRect, and ProgressBar all inherit from it. Control nodes live in screen space, not world space.
- Anchors pin an element to a point on its parent so it stays put when the window resizes. They are ideal for simple layouts like a health bar in a corner.
- Containers arrange their children automatically. Reach for them when you have lists, rows, or grids of elements that should lay themselves out.
The rest of this guide takes each one in turn, then puts them together into a working HUD.
Control Nodes and Anchors
Every Control has four anchor values, one per edge (left, top, right, bottom), each running from 0.0 to 1.0 across the parent. An anchor of 0.0 is the parent’s left or top edge, 1.0 is the right or bottom, and 0.5 is the center. The anchor decides what the element sticks to; the offset is the pixel distance the edge sits from that anchor point.
You rarely type anchor values by hand. The Anchor Preset menu in the toolbar gives you presets like top-left, center, and full-rect. Anchor a health bar to the top-left and it stays in that corner no matter the screen size. Because anchors handle resolution changes on their own, they are all you need for a simple HUD element or a dialogue box.
Containers: Auto-Layout for UI
When you have several elements that should line up, containers do the arranging for you. A container positions its children by its own rules, so its children give up manual positioning. This leads to the single most common beginner mistake, so it is worth stating plainly: never set anchors or offsets on a container’s children. The container overrides them.
| Container | What It Does |
|---|---|
| VBoxContainer | Stacks children in a vertical column. |
| HBoxContainer | Lines children up in a horizontal row. |
| GridContainer | Arranges children in a grid with a set column count. |
| MarginContainer | Adds padding around its child, useful for screen margins. |
| CenterContainer | Centers its children at their minimum size. |
| PanelContainer | Draws a background panel and fits its child inside. |
The rule of thumb: use anchors for a few fixed elements, and containers the moment the layout is dynamic, like an inventory grid or a row of ability buttons. Containers also nest, so a MarginContainer holding a VBoxContainer of HBoxContainers is a completely normal menu.
Building a HUD on a CanvasLayer
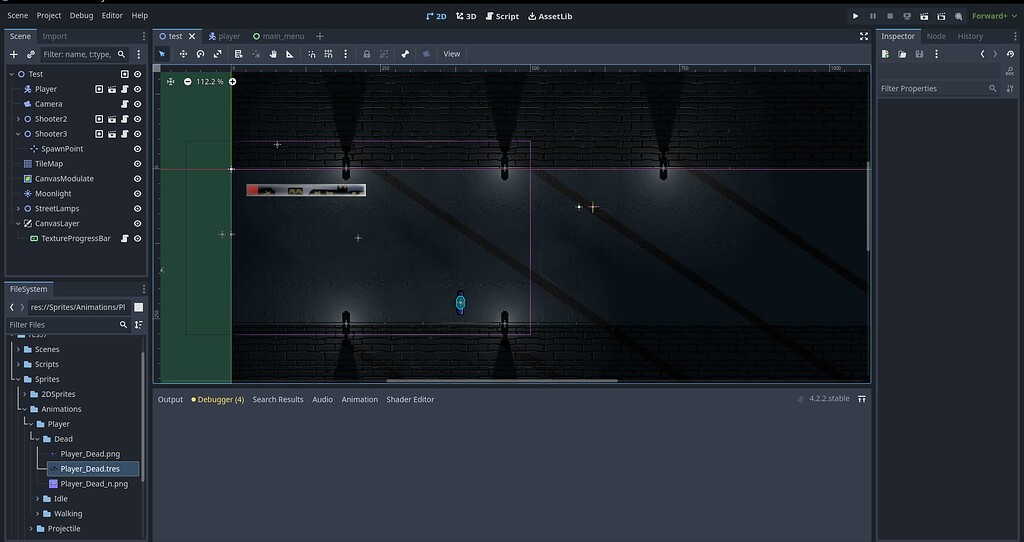
A HUD needs to stay glued to the screen while the camera follows the player. The node for that is CanvasLayer, which draws its children on top of the game and ignores camera movement. Build the HUD as a child of a CanvasLayer:
- Add a CanvasLayer node, and under it a root Control set to the full-rect anchor preset.
- Add a TextureProgressBar (or ProgressBar) for health, anchored to the top-left.
- Add a Label for the score, anchored to the top-right.
- Save the HUD as its own scene so you can drop it into any level.
That is the whole visual side. The bar has a value and a max_value, and the Label has a text property. The real question is how those get updated, which is the next section and the one that matters most.
Binding the HUD With Signals
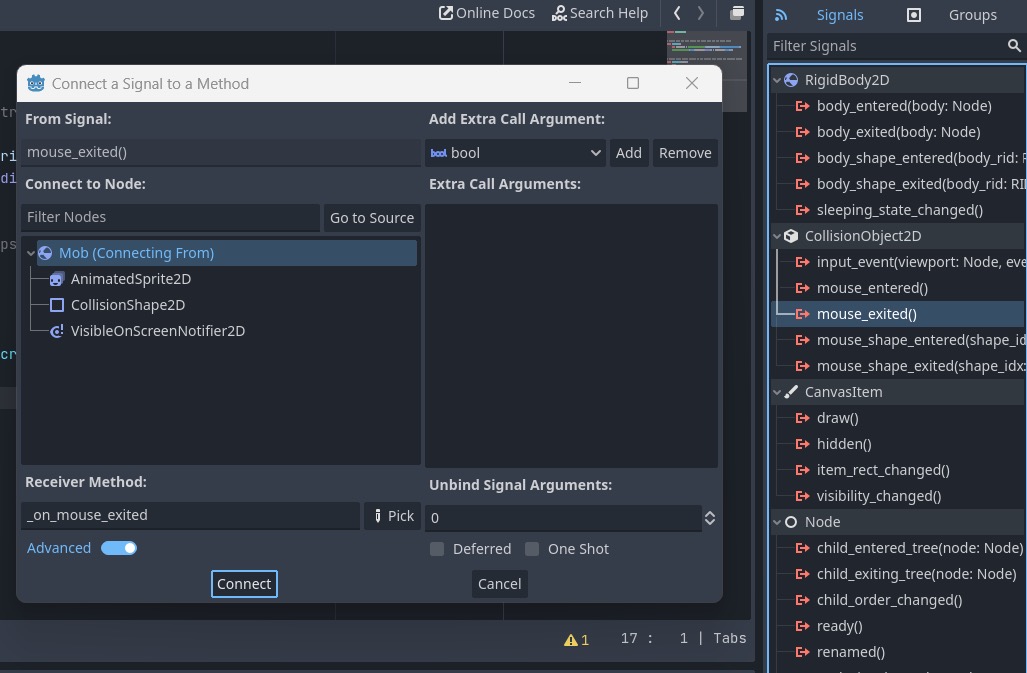
Here is the tempting wrong way. Give the HUD a reference to the player and read its health every frame:
# Anti-pattern: polling every frame
func _process(delta: float) -> void:
	health_bar.value = player.health   # runs ~60x a second, even when nothing changed
This works, and it rots. It runs constantly for no reason, and it hard-wires the HUD to the player’s exact structure, so the two can never move apart. The sustainable approach flips it: the data source announces a change, and the UI listens. That is the observer pattern, and in Godot it is a signal.
Start at the source. Make health a property with a setter that emits a signal only when the value actually changes, so a value that never moves never triggers a redraw.
extends CharacterBody2D

signal health_changed(current: int, max_health: int)

@export var max_health := 100
var health: int:
	set(value):
		var clamped := clampi(value, 0, max_health)
		if clamped == health:
			return          # no change, no signal, no wasted work
		health = clamped
		health_changed.emit(health, max_health)

func _ready() -> void:
	health = max_health
Now the UI side. The key idea for a maintainable interface is decentralized binding: each widget owns a small script that subscribes to its own data source, rather than one god-script reaching into every label. The health bar binds itself.
# Attached to the TextureProgressBar
extends TextureProgressBar

func _ready() -> void:
	var player := get_tree().get_first_node_in_group("player")
	player.health_changed.connect(_on_health_changed)

func _on_health_changed(current: int, max_health: int) -> void:
	max_value = max_health
	value = current
The bar finds the player through a group instead of a fixed node path, so it does not care where the player sits in the tree. It updates only when health_changed fires, which happens only when health actually changes. That is the controlled, efficient loop: change the data once, the UI reacts once. Adding a second bar, a shield meter, or a damage flash means writing one more small self-contained script, never editing the player.
A Global Signal Bus for Decoupled UI
Connecting directly works when the widget can reach its source. Often it cannot: the score lives in a game manager, the UI is in a different scene, and neither should hold a reference to the other. The clean answer is a global signal bus, an autoload whose only job is to carry signals. This is the Event Bus pattern applied to UI.
# Events.gd, added as an Autoload named "Events"
extends Node

signal player_health_changed(current: int, max_health: int)
signal score_changed(new_score: int)
Anything that changes score emits through the bus, and the score Label listens to the bus. Neither side knows the other exists.
# Somewhere in gameplay
Events.score_changed.emit(new_score)

# Attached to the score Label
extends Label

func _ready() -> void:
	Events.score_changed.connect(_on_score_changed)

func _on_score_changed(new_score: int) -> void:
	text = "Score: %d" % new_score
This is decentralized and sustainable: emitters fire events without knowing who listens, and each UI element subscribes to exactly the events it cares about. New screens plug into the same bus. For larger games, pairing this with a central data manager that owns the values and emits on change gives you one source of truth feeding every widget.
Common Mistakes
Do This
- Put the HUD on a CanvasLayer so it stays fixed on screen.
- Update the UI from signals that fire only when a value changes.
- Give each widget its own small script that binds to its data source.
- Use a global signal bus autoload when emitter and UI live in different scenes.
- Guard the setter so an unchanged value emits nothing.
Avoid This
- Polling values in
_processwhen a signal would update on change. - Setting anchors or offsets on a container’s children.
- One central UI script that reaches into every label and bar.
- Hard-coding node paths from the HUD into the player’s tree.
- Building the HUD in world space, where the camera drags it around.
Frequently Asked Questions
What are Control nodes in Godot 4?
Control is the base class for every UI element in Godot 4, including Label, Button, TextureProgressBar, and Panel. Control nodes live in screen space and use anchors and containers to position themselves, which is what makes them different from Node2D-based game objects.
When should I use anchors vs containers in Godot?
Use anchors for a few fixed elements, like a health bar pinned to a corner, since anchors keep them in place when the window resizes. Use containers when elements should arrange themselves, like a list, a row of buttons, or a grid. Never set anchors on a container’s children, because the container controls their layout.
How do I update a health bar in Godot 4?
Give the health value a setter that emits a signal like health_changed only when the value changes, then connect the TextureProgressBar to that signal and set its value in the handler. This updates the bar only when health actually changes, instead of reading the value every frame in _process.
Why should I use signals instead of polling for UI?
Polling reads a value every frame even when nothing changed, which wastes work and hard-wires the UI to the data’s structure. A signal fires only on change, so the UI reacts exactly once and the two stay decoupled. It is more efficient and far easier to maintain as the project grows.
What is a signal bus in Godot 4?
A signal bus is an autoload (global singleton) whose only job is to declare signals that any part of the game can emit and any part can listen to. It lets a game manager broadcast an event like score_changed without knowing which UI element displays it, which keeps emitters and UI fully decoupled across scenes.
Gear for Coding Sessions
UI work is a lot of nudging pixels, resizing windows, and testing layouts, so a capable machine and a comfortable desk pay off over a long session. Here are three picks from the deals database, current as of July 2026.

MacBook Pro 14″ (M2 Pro)
Apple Silicon runs the Godot editor smoothly and drives a high-resolution external display without breaking a sweat.

KOORUI 27″ 240Hz
A big, cheap 27-inch panel that gives your UI scenes and the game preview room to sit side by side.

Ergonomic Vertical Mouse
A vertical grip that keeps your wrist neutral through hours of dragging anchors and resizing panels.
Away from the keyboard, Berry Finds tracks real-time Amazon deals on thousands of everyday products across home, kitchen, beauty, and more so you never overpay on the stuff you buy regularly.
Summary
Godot 4 UI is Control nodes arranged with anchors for fixed elements and containers for dynamic ones, with the HUD sitting on a CanvasLayer so it stays fixed on screen. The part that decides whether your project stays healthy is the binding: drive the UI from signals that fire only on change, give every widget its own small script, and route cross-scene events through a global signal bus. That keeps a health bar or score counter updating in a controlled, efficient, decentralized way, with no per-frame polling and no god-script.
This rounds out the core of a 2D game. With a movement controller, an animated character, and a signal-driven HUD, you have every system talking cleanly to the rest. The next steps, menus, audio, and saving, all plug into the same signal-driven foundation.