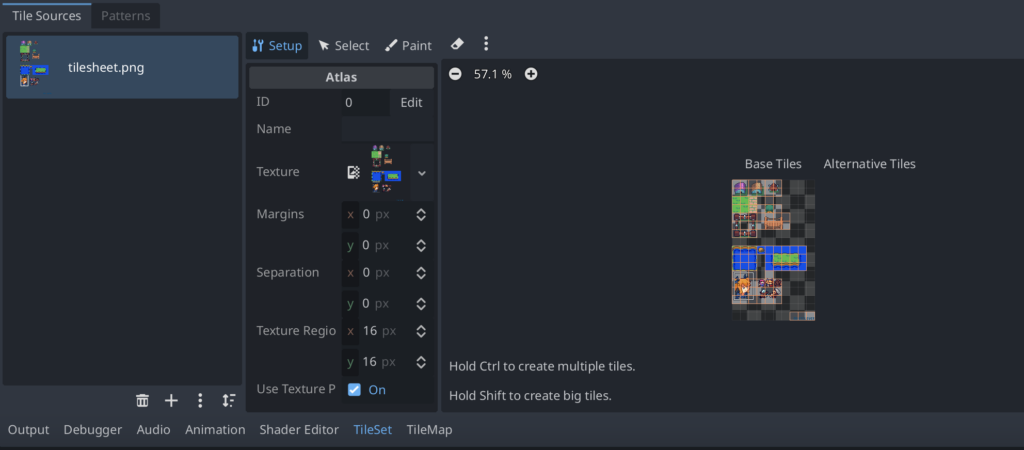
The Godot 4 TileMapLayer node is how you build 2D levels by painting tiles onto a grid instead of placing hundreds of individual sprites. If you followed an older tutorial and cannot find the TileMap node, that is not a bug: Godot 4.3 deprecated the old TileMap and split it into separate TileMapLayer nodes, one per layer. This guide covers the current workflow start to finish: creating a TileSet, painting a level, adding collision, stacking multiple layers, editing tiles from code, and migrating an old TileMap project. Everything here targets Godot 4.3 and later.
The change is more than a rename. Because each layer is now its own node, a lot of old code and habits need small adjustments, and this guide flags each one as it comes up.
Key Takeaways
- TileMap is deprecated: as of Godot 4.3 the old TileMap node is replaced by TileMapLayer, where each layer is a separate node in the scene tree.
- One TileSet, many layers: multiple TileMapLayer nodes share a single TileSet resource, and their draw order follows their order in the scene tree.
- Collision lives in the TileSet: add a physics layer to the TileSet, paint collision onto wall tiles, and make sure the player’s collision mask matches.
- set_cell dropped the layer argument: a TileMapLayer holds one layer, so it is
set_cell(coords, source_id, atlas_coords), not the oldset_cell(layer, coords, ...). - Old projects can convert: the TileMap panel has an option to extract a legacy TileMap’s layers into individual TileMapLayer nodes.
What Changed: TileMap vs TileMapLayer
Older Godot used a single TileMap node that held every layer inside it. You added layers in the Inspector, then clicked a tab at the bottom of the editor to choose which one your brush painted on. As of Godot 4.3, that node is deprecated. Each layer is now its own TileMapLayer node placed in the scene tree.
The practical differences are worth knowing before you start. Layer order is set by node order in the tree, not by an index in a dropdown. You select a layer by clicking its node, not a tab. And each layer can be shown, hidden, moved, or scripted on its own, which makes complex scenes far easier to manage. New projects should use TileMapLayer, because every tutorial written after mid-2024 assumes it.
Creating a TileSet
A TileSet is the palette of tiles a TileMapLayer draws from. You build it once and reuse it across every layer and level in your game.
- Add a TileMapLayer node to your scene and select it.
- In the Inspector, find the Tile Set property and create a new TileSet resource on it.
- Open the TileSet panel at the bottom of the editor.
- Drag your tilesheet image into the panel as an atlas source.
- Set the tile size (commonly 16×16 or 32×32) so Godot slices the sheet into individual tiles.
Save the TileSet as its own .tres resource file using the dropdown next to the property. That turns it from an embedded resource into a shared one, so every layer and level points at the same palette. Update the tiles once and the change flows everywhere.
Painting Your First TileMapLayer
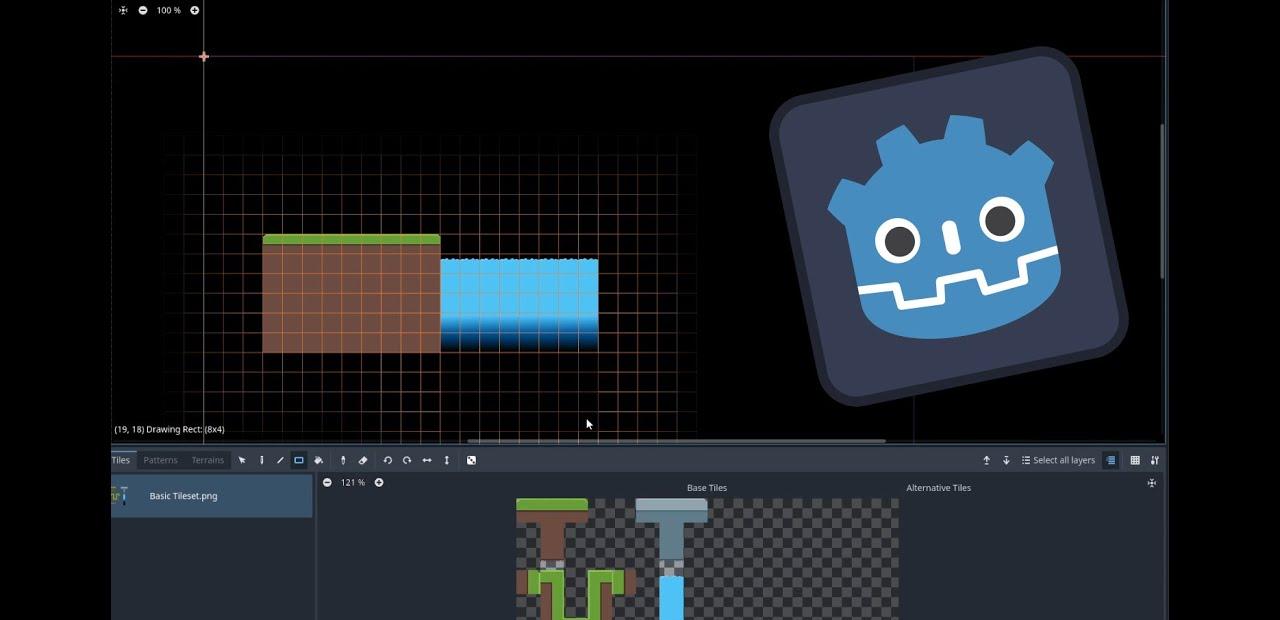
With a TileSet in place, painting is direct. Select the TileMapLayer node, open the TileMap panel at the bottom of the editor, and pick a tile from the palette. Now draw onto the grid in the viewport.
Four tools cover almost everything. Paint places one tile at a time, Line draws a straight run, Rectangle fills a box, and Bucket Fill floods a connected area. Right-click erases. For blocking out a level fast, rectangle and bucket fill do the heavy lifting, then you clean up edges with the paint tool.
Adding Collision to Tiles
Painted tiles are just visuals until you give them collision. In Godot 4 that lives in the TileSet, not on the layer, so any layer using the TileSet inherits it.
- Open the TileSet panel and add a Physics Layer in its properties.
- Select the tiles that should be solid, such as ground and walls.
- Paint a collision polygon onto those tiles (a full rectangle for a solid block).
- On your player, make sure its collision mask includes the physics layer number you assigned.
The TileMapLayer node also has a Collision Enabled property that must stay on for the physics to register. Once the tiles have collision and the masks line up, a 2D platformer controller will land on your painted ground instead of falling through it.
Using Multiple TileMapLayer Nodes
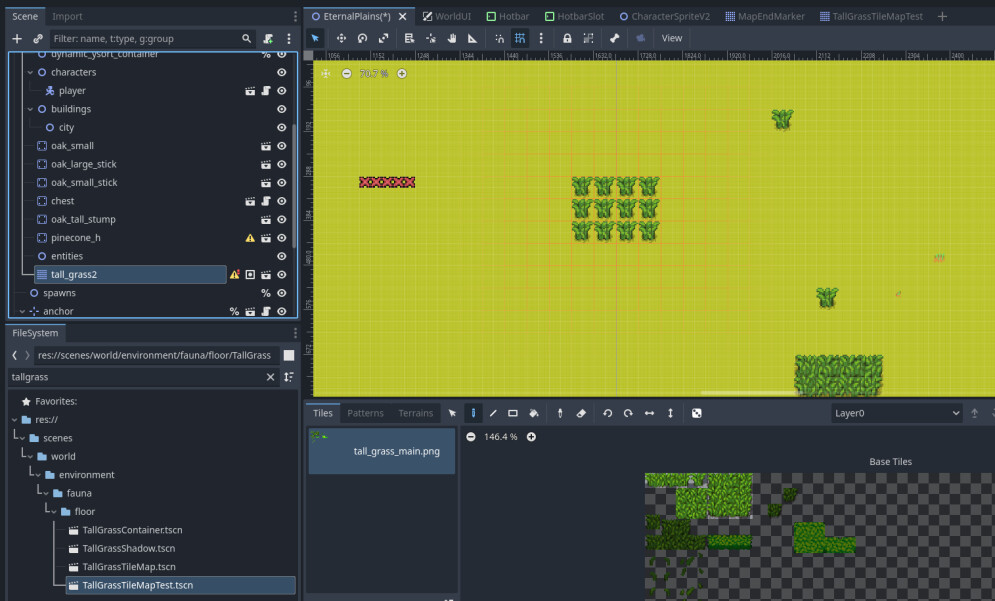
Real levels use several layers. A common split is three TileMapLayer nodes, each pointing at the same TileSet:
- Background: sky, distant scenery, non-collidable decoration behind the action.
- Ground: the solid floors and walls the player interacts with, with collision enabled.
- Details: grass tufts, signs, and overlays drawn on top of everything.
Draw order follows tree order, so a node lower in the tree renders in front. Because each layer is a real node, you can toggle its visibility, animate it, or move it independently, none of which was clean to do with the old single-node TileMap.
Editing Tiles From Code
Placing and reading tiles at runtime is how you build breakable walls, procedural levels, and interactive terrain. Grab a reference to the layer, then use its cell methods.
@onready var ground: TileMapLayer = $Ground

func _ready() -> void:
	# Place a tile: cell (3, 5), atlas source 0, tile at atlas coords (1, 0)
	ground.set_cell(Vector2i(3, 5), 0, Vector2i(1, 0))

	# Read what is under the mouse
	var cell := ground.local_to_map(ground.get_local_mouse_position())
	var source := ground.get_cell_source_id(cell)
	if source != -1:
		print("Tile found at ", cell)
Here is the single most important change from the old TileMap. Because a TileMapLayer holds only one layer, set_cell() no longer takes a layer index as its first argument. The signature is set_cell(coords, source_id, atlas_coords, alternative_tile). Old code that reads set_cell(0, coords, source, atlas) will not work on a TileMapLayer. Passing a source_id of -1 erases the cell, and get_cell_source_id() returns -1 for an empty cell, which is how you test whether a tile exists. This same code-driven approach powers procedural dungeon generation, where an algorithm calls set_cell() thousands of times to build a level.
Migrating an Old TileMap
If you open an older project, its TileMap nodes still work for now but show a deprecation warning. Converting them is a two-click job. Select the old TileMap node, open the TileMap panel, click the toolbox icon in the top-right corner, and choose Extract TileMap layers as individual TileMapLayer nodes. Godot creates one TileMapLayer per internal layer and preserves your painted tiles.
After extracting, update any scripts that referenced the old node. The layer-indexed calls like set_cell(0, ...) and get_cell_source_id(0, ...) lose their first argument, and a single get_node reference to the TileMap becomes one reference per layer. It is mechanical work, but the deprecation warning is your checklist.
Common Mistakes
Do This
- Save the TileSet as a shared
.tresso every layer and level uses one palette. - Put collision on the tiles in the TileSet, then match the player’s collision mask.
- Use separate TileMapLayer nodes for background, ground, and details.
- Order layers by their position in the scene tree, lower renders in front.
- Call
set_cell(coords, source_id, atlas_coords)with no layer argument.
Avoid This
- Following a pre-4.3 tutorial that uses the deprecated single TileMap node.
- Passing a layer index to
set_cell(), which errors on a TileMapLayer. - Forgetting to enable Collision Enabled on the layer that needs physics.
- Leaving the player’s collision mask off the tiles’ physics layer.
- Embedding the TileSet in one scene instead of saving it as a resource.
Frequently Asked Questions
What replaced TileMap in Godot 4?
The TileMapLayer node replaced TileMap as of Godot 4.3. Instead of one node holding every layer internally, each layer is now its own TileMapLayer node in the scene tree. The old TileMap node is deprecated but still works with a warning.
What is the difference between TileMap and TileMapLayer?
TileMap was a single node that stored multiple layers inside it, selected by a tab in the editor. TileMapLayer holds one layer per node, so layers live in the scene tree and can be shown, hidden, moved, and scripted independently. Multiple TileMapLayer nodes share one TileSet resource.
How do you set a tile from code in Godot 4?
Call set_cell on the TileMapLayer: set_cell(coords, source_id, atlas_coords). For example, ground.set_cell(Vector2i(3, 5), 0, Vector2i(1, 0)) places the tile at atlas coordinates (1, 0) from source 0 into cell (3, 5). Unlike the old TileMap, there is no layer argument because a TileMapLayer has only one layer.
How do you add collision to a tilemap in Godot 4?
Add a physics layer in the TileSet panel, then paint a collision polygon onto the solid tiles. Keep Collision Enabled on the TileMapLayer, and make sure the player’s collision mask includes the physics layer you assigned. Collision is stored in the TileSet, so every layer using it inherits the shapes.
How do you convert an old TileMap to TileMapLayer?
Select the old TileMap node, open the TileMap panel, click the toolbox icon in the top-right, and choose Extract TileMap layers as individual TileMapLayer nodes. Godot creates one TileMapLayer per layer and keeps your tiles. Afterward, update scripts to remove the layer index from calls like set_cell.
Gear for Coding Sessions
Building levels means long sessions of drawing tiles, testing, and tweaking art. The machine you build on matters most, and a sharp screen plus a tablet for your own tile art round out a solid game-dev setup. Here are three picks from the deals database, current as of July 2026.

MacBook Pro 14″ (M2 Pro)
Apple Silicon runs the Godot editor cool and fast, and the battery lasts a full day of coding away from a desk.

Samsung Odyssey G5 27″ QHD
QHD sharpness makes pixel-perfect tile alignment easy, with room for the editor and the running game side by side.

HUION Inspiroy H1060P
A budget pen tablet for drawing your own tilesheets instead of hunting for the right asset pack.
Away from the keyboard, Berry Finds tracks real-time Amazon deals on thousands of everyday products across home, kitchen, beauty, and more so you never overpay on the stuff you buy regularly.
Summary
Godot 4’s TileMapLayer trades one crowded node for a cleaner setup where each layer stands on its own. Build a shared TileSet, paint your level, add collision in the TileSet, and stack multiple TileMapLayer nodes for background, ground, and detail. When you need tiles to change at runtime, set_cell() handles it, just remember it no longer takes a layer argument. And if you are opening an old project, the extract option turns a legacy TileMap into modern nodes in two clicks.
With a level in place, the next steps are movement and interaction. Drop in a character, wire up collision, and connect events with Godot 4 signals. If you are still deciding how to script all of it, our GDScript vs C# comparison lays out the tradeoffs.