
📋 TL;DR
- Always play on 2x modifier maps (Night Raid, EM Storm, Hidden Bunker, Locked Gate, Cold Snap)
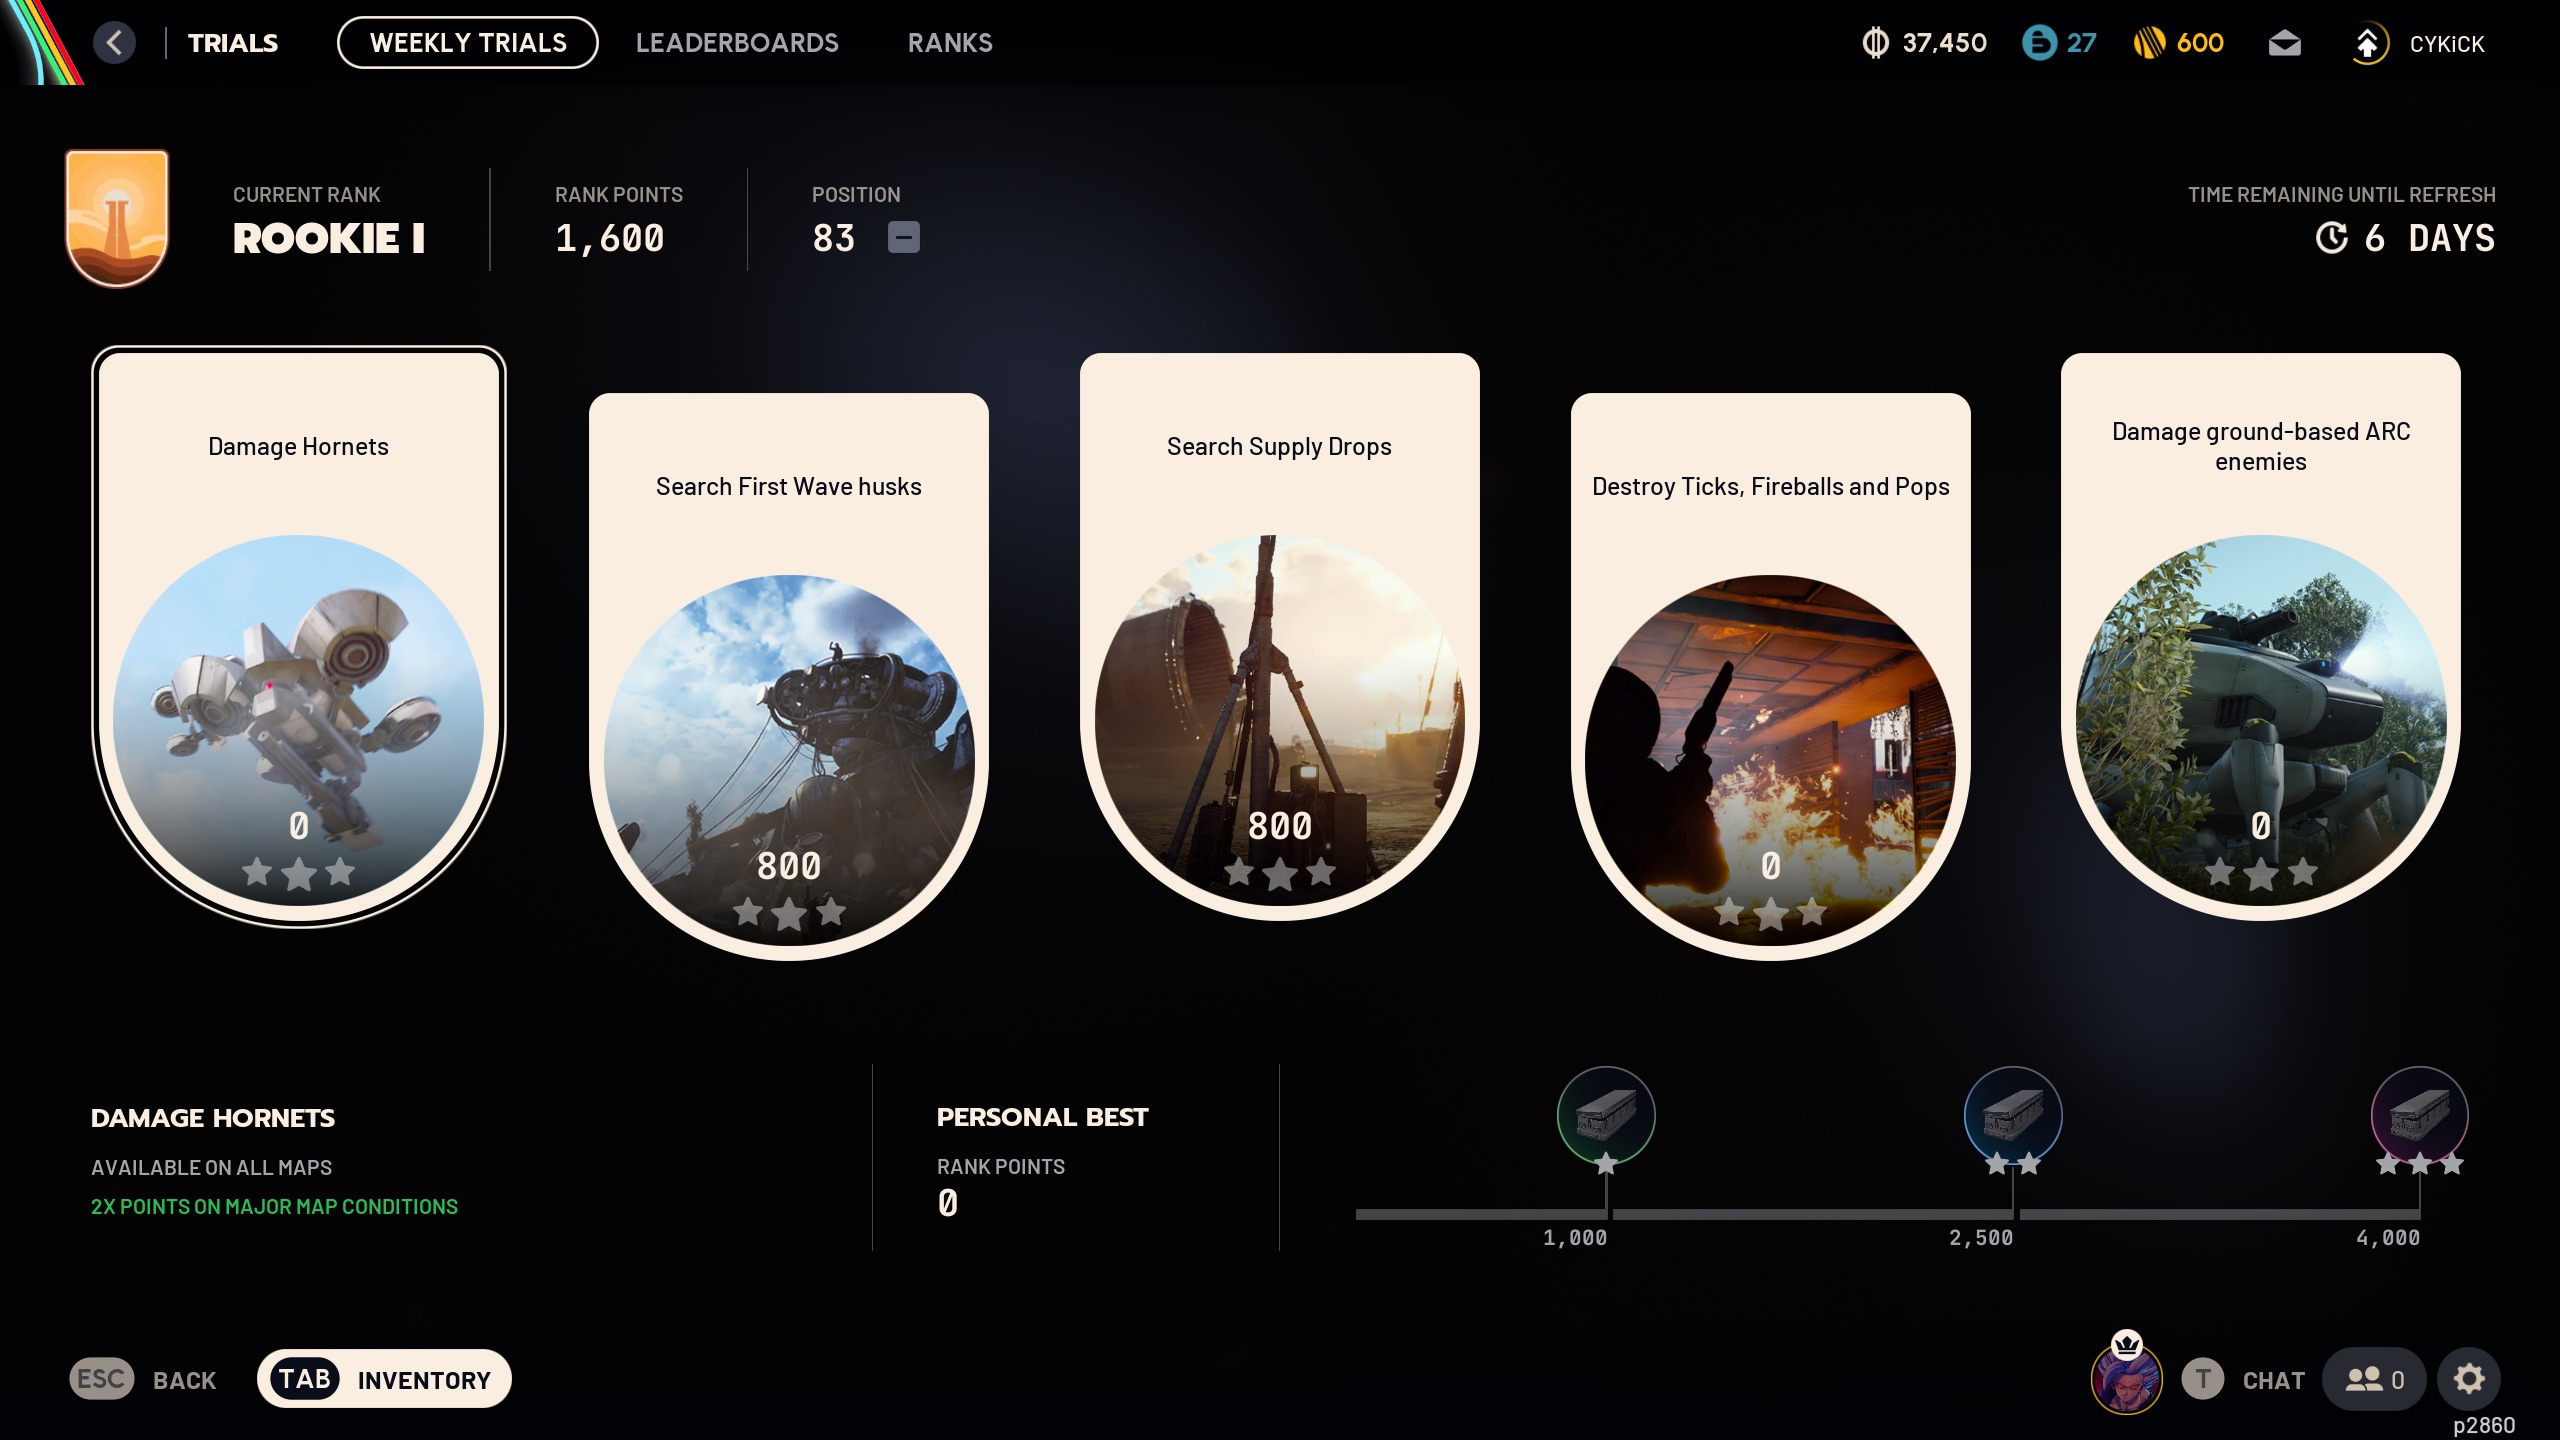
- 4,000 points per trial = 3 stars = Epic reward. That’s your weekly target on all 5.
- Focus one trial per raid. Don’t split attention across multiple objectives.
- No extraction = zero points. A dead raider keeps nothing.
- Friendly Lobby for score pushing. Less PvP pressure, same trial points.
The Arc Raiders trials guide you’re reading exists because the weekly trial system is where most raiders hit a wall. You know the objectives, you run the maps, and you still end the week with two trials stuck at 2 stars. The difference between consistent triple rank and falling short comes down to map selection, the 2x modifier system, and knowing exactly where to go for each trial type. This guide covers all of it.
If you’re still getting your bearings with the game’s core loop, check out our beginner guide first. Trials unlock at Level 15 and assume you’re comfortable with extraction basics.
📋 In This Guide
How Trials Work
Every Monday, you get 5 new trial challenges pulled from a rotating pool. Each challenge has a specific objective: damage a certain enemy type, collect items, complete events. You earn points by doing that objective during raids, but here’s the thing that trips people up: points only count when you extract. Die before reaching the extraction point and your score for that run is zero. It doesn’t matter if you killed 15 Leapers. No extraction, no points.
Only your personal best score on each challenge is saved. So if you score 3,200 on a trial and then run it again for 2,800, you keep the 3,200. This means you can keep pushing for a higher score without risk of losing progress.
Each challenge has three reward tiers:
| Points | Stars | Reward |
|---|---|---|
| 1,000 | 1 star | Random Uncommon item |
| 2,500 | 2 stars | Random Rare item |
| 4,000 | 3 stars | Random Epic item |
Your combined best scores across all 5 challenges determine your leaderboard placement within your division (100 raiders per division). That placement determines whether you rank up, hold, or drop.
The 2x Modifier System
This is the single most important thing in this guide. Maps rotate through different conditions, and five of them are Major Map Conditions that double all trial points earned on that map:
- Night Raid
- Electromagnetic Storm
- Hidden Bunker
- Locked Gate
- Cold Snap
The math is simple. A Leaper kill is worth 1,760 points normally. On a 2x map, it’s 3,520. That means a single Leaper kill on the right map gets you close to 3 stars by itself. Without the 2x modifier, you’re grinding twice as hard for the same result.
⚡ Weekly routine: Before you start grinding trials each week, check which maps have Major Map Conditions active. Plan your runs around those maps. If none of the 2x maps suit a specific trial, wait a day or two for the rotation to change.
Other modifiers like Prospecting Probes or minor conditions don’t give double points. Ignore them for trial purposes.
Arc Raiders Trials Guide: Every Trial Type and Best Map
Trials pull from a rotating pool each week. Here’s every known trial type, the points per action, the best map to run it on, and the quick strategy.
Combat Trials
| Trial | Points (base) | Best Map | Strategy |
|---|---|---|---|
| Damage Leapers | 1,760 per kill | Dam Battlegrounds | 4 fixed spawn areas: Water Treatment, Hydroponic, Red Lake, Testing Annex. Rotate between them. |
| Damage Bastions | 2,250 per kill | Spaceport (Hidden Bunker) | Spawn near bunker entrance. Bring Deadline Mines and Wolfpack grenades. Target knee joints first. |
| Damage Rocketeers | 1,320 per kill | The Blue Gates (Locked Gate) | Only 2 kills needed for 3 stars with 2x. Use Jupiter/Wolfpack combo. Shoot off thrusters to ground them. |
| Damage Shredders | 693 per kill | Stella Montis (Night Raid) | 3 kills for 3 stars with 2x. Hullcracker recommended for armor strip. |
| Damage Hornets | Varies | Any EM Storm map | Target center mass, not armored weak points. EM Storm increases flying enemy spawns. |
| Damage Snitches | Varies | Spaceport / Buried City | Solo approach works best. Loop hospital, library, parking garage. |
| Ground-Based ARC | 0.7-0.8 per dmg | Spaceport (Hidden Bunker) | Focus Bastions/Bombardiers for best points-per-damage ratio. Bring heavy ammo (80+). |
| Damage Queens | ~16,000 max | Any | Target legs and armor plates first, then the core. Queen is worth more than Matriarch. |
| Destroy Fireballs | 364 per kill | Stella Montis / Buried City | 6 kills needed for 3 stars with 2x. Search interior locations, they spawn indoors. |
| Destroy Pops | Varies | Any with 2x modifier | Small enemies, appear in groups. Area damage weapons work well. |
Scavenging and Interaction Trials
| Trial | Points (base) | Best Map | Strategy |
|---|---|---|---|
| Search First Wave Husks | 300 per husk | Spaceport (EM Storm) | 7 husks with 2x modifier hits 3 stars. High-density clusters near main buildings. |
| Search Supply Drops | 800 per drop | Any with 2x modifier | 3 drops on a 2x map = 4,800 points. Check marked locations on the map. |
| Harvest Plants | 250 per plant | Dam Battlegrounds | Swamp area has 60+ mushrooms and 40+ Great Mullein. Split zones with teammates. |
| Open ARC Probes | 667 per probe | Spaceport (EM Storm) | Rooftops, fuel storage, control tower. Bring ziplines or snap hooks for access. |
| Deliver Carriables | 500 per delivery | Dam Battlegrounds | 6 field depots available. Power Generation Complex and Water Towers are closest together. |
| Frozen Containers | 1,000 per container | Any Cold Snap map | Only available during Cold Snap condition. 2 containers with 2x = 4,000 points exactly. |
| Hidden Bunker Data | 400 per computer | Spaceport | Activate 4-6 satellites outside, then interact with 8 computers inside. Max 6,400 points. |
| Prospecting Probes | Varies | Spaceport (EM Storm) | Rooftop access is key. Use ziplines and snap hooks to reach elevated positions. |
Rank System and Rewards
The trials rank system has 14 tiers. Each tier except the top two has three sub-ranks (I, II, III):
| Rank | Sub-ranks | Notes |
|---|---|---|
| Rookie | I, II, III | Starting rank for new players |
| Tryhard | I, II, III | |
| Wildcard | I, II, III | |
| Daredevil | I, II, III | Alpino Outfit unlocks at Daredevil I (Season 2) |
| Hotshot | None | Exclusive outfit color |
| Cantina Legend | None | Top 1,000 globally. Ultimate cosmetics. |
When you earn at least one trial point in a week, you’re placed in a division of 100 raiders. Your placement in that division (based on total best scores) determines promotion:
- Top 30: Double promotion (skip a sub-rank)
- 31-60: Single promotion
- 61-80: Hold current rank
- 81-100: Demoted one sub-rank
Returning players start 2 ranks below their previous season placement. Divisions fill first-come first-serve each week, so getting your points in early can land you in a less competitive group.
How to Hit 4,000 Points on Every Trial
Getting 3 stars on one trial is easy. Getting 3 stars on all five consistently every week takes a system. Here’s what works.
1. Check the weekly modifiers first
Before you load into a single raid, look at which maps have Major Map Conditions. Match your trial objectives to those maps. If the Leaper trial is active and Dam Battlegrounds has Night Raid, that’s where you go. If no 2x map makes sense for a particular trial, wait for the daily rotation to change.
2. One trial per raid
This is the most common mistake. Raiders try to work on 2-3 trials in a single run, end up splitting their focus, and come out with middling scores on everything. Pick one trial, build your loadout around it, go in, hit your number, and extract. Then switch to the next trial on a fresh run.
3. Use Friendly Lobby for score pushing
If you’re pushing for a high score on a specific trial, switch to Friendly Lobby. Same trial points, fewer hostile players. You can focus entirely on the objective without worrying about getting jumped during a Bastion fight. For general tips on PvP situations, we have a separate guide.
4. Bring the right loadout
Your trial loadout should match the objective. For combat trials against large ARCs (Bastions, Rocketeers), bring:
- Hullcracker or Anvil IV (high damage output)
- Wolfpack and Trailblazer grenades
- Deadline Mines (3-5)
- 80+ Heavy Ammo
- 10 Shield Rechargers, 10-15 Bandages
- Adrenaline Shots for repositioning
- Photoelectric Cloak for mine placement
For scavenging trials (plants, husks, probes), swap combat gear for mobility: ziplines, snap hooks, and smoke grenades. Speed matters more than firepower. Check our weapons tier list for the current meta picks.
5. Learn the spawn locations
ARC enemies spawn at fixed points with 5-7 minute respawn timers after being destroyed. Once you know a map’s spawn layout, you can rotate between points instead of wandering. For example, Leapers on Dam Battlegrounds always appear at Water Treatment Control, Hydroponic, Red Lake area, and Testing Annex. Kill one group, move to the next, and the first group respawns by the time you circle back.
6. Extract clean
This sounds obvious but it’s worth repeating: don’t get greedy. If you’re sitting at 4,200 points, extract. Don’t push for 5,000 and risk dying to a player or a random ARC patrol. Your best score is saved, so you can always run it again. But if you die, that entire run is wasted. Plan your extraction route before you start the raid, and keep your extraction fundamentals tight.
Frequently Asked Questions
Do trial points count if I die before extracting?
No. If you die before reaching the extraction point, your score for that run is zero. Points only finalize after a successful extraction back to Speranza. Always prioritize getting out alive over pushing for a few extra points.
What is Friendly Lobby in Arc Raiders?
Friendly Lobby is a matchmaking mode where other players can’t attack you. Trial points work exactly the same. Use it when you’re focused on hitting a high score without PvP interference. Our friendly lobby guide explains exactly how to get into one for solo, duo, and trio play.
Can I improve my trial score after submitting it?
Yes. Only your personal best score on each challenge is kept. If you score 3,200 and then run it again for 4,500, your score updates to 4,500. You can never lose progress on a challenge by running it again.
When do Arc Raiders trials reset?
Trials reset every Monday. You get 5 new challenges from the rotating pool, and your division ranking is recalculated based on the previous week’s scores. Rank promotions and demotions happen at this time.
Should I do trials solo or with a team?
Both work. Solo in Friendly Lobby is great for scavenging trials and score pushing since there’s no competition for resources. Teams are better for combat trials against large ARCs like Bastions and Queens, where you can split roles and cover more ground. Party completion benefits all members.
The trial system in Arc Raiders rewards preparation over raw skill. Know your maps, run on 2x modifiers, focus one trial per raid, and extract before you get greedy. Do that consistently and triple rank stops being something you grind for and starts being something that just happens every Monday.